The video provides a comprehensive, step-by-step tutorial on achieving a long-lasting manicure at home, addressing common issues like chipping and cuticle flooding. The creator's relatable approach, clear instructions, and demonstration of specific products make it a valuable resource for DIY nail enthusiasts.
Summary
This video demonstrates a six-step process for applying nail polish to achieve a long-lasting manicure without gel. The steps include oiling cuticles, removing old polish, pushing back cuticles, applying a base coat, painting with color polish, and finishing with a top coat. The creator emphasizes proper application techniques to avoid chipping and ensure durability.
Structure
1Introduction and overview of the process
2Step 1: Oiling cuticles
3Step 2: Removing old polish
4
Original caption
I hope this helps out anyone getting into doing their nails at home! It takes some practice, but you get faster and better each time. I'm on a low-buy so i can't try every product out there right now, but try these steps with what you have before buying anything new! ~ Timestamps: Step 1: Oil cuticles ~ 0:10 Step 2: Remove Old Polish ~ 0:30 Step 3: Remove Cuticles ~ 1:00 Step 4: Base Coat ~ 2:00 Step 5: Painting Color~ 3:25 Step 6: Top Coat ~ 5:20 #indienailpolish #diynails
More from @solosnotbuyingit
More breakout videos from this creator.
Step 3: Cleaning and pushing back cuticles
5Step 4: Applying base coat
6Step 5: Applying color polish
7Step 6: Applying top coat and cleanup
Product placement
HandsDown Ultra nail pads (used for removing old polish, price: $26 for 240 pack on Amazon, removing it would change how the video proceeds)
Jojoba Oil (used for oiling cuticles, can be substituted with almond oil, removing it would change how the video proceeds)
Sweet Almond Oil (used for oiling cuticles, can be substituted with jojoba oil, removing it would change how the video proceeds)
OPI Natural Nail Base Coat (used as a base coat, price: $9-$11 depending on location, removing it would change how the video proceeds)
Bee's Knees Lacquer "The Water Remembers" (used as the color polish, price: $14, removing it would change how the video proceeds)
Essie Top Coat (used as a top coat, price: $11, removing it would change how the video proceeds)
On-screen text
How I get my nails to last up to 2 weeks (natural nails, no gel)
This is how I do my nails to get them to last up to 2 weeks with regular nail polish
I'm not gonna do multiple parts, so this is gonna be a bit of a long one
Timestamps:
Step 1: Oil cuticles ~ 0:10
Step 2: Remove Old Polish ~ 0:30
Step 3: Remove Cuticles ~ 1:00
Step 4: Base Coat ~ 2:00
Step 5: Painting Color~ 3:25
Step 6: Top Coat ~ 5:20
also in the caption*
Step 1:
Oiling Cuticles
Step 2:
Remove Old Polish
price: $26 for 240 pack
on Amazon
Step 3:
Pushing Back Cuticles
i only cut off hangnails*
cuticle
proximal nail fold of the eponychium
hangnail
side wall
nail plate
free edge
Step 4:
Base Coat
price: $9-$11
depending on location
flooded cuticles = nail polish
pooling where skin and nails meet
cap that free edge!!
optional step*
Step 5:
Painting the Nails!
price: $14
Step 6:
Top Coat
price: $11
my top coat is
touch dry in just 8-10 min
but it can still dent if
you press hard
"but solo I can just pick
it off in the shower!"
The Clean-Up Brush
May your manis be
long lasting and chip free
Transcript
How I get my nails to last up to 2 weeks (natural nails, no gel)
This is how I do my nails to get them to last up to 2 weeks with regular nail polish
I'm not gonna do multiple parts, so this is gonna be a bit of a long one
Timestamps:
Step 1: Oil cuticles ~ 0:10
Step 2: Remove Old Polish ~ 0:30
Step 3: Remove Cuticles ~ 1:00
Step 4: Base Coat ~ 2:00
Step 5: Painting Color~ 3:25
Step 6: Top Coat ~ 5:20
also in the caption*
Step 1:
Oiling Cuticles
I'm gonna start by oiling my cuticles because this area is about to get blasted with acetone, so this is kind of a protective layer to prevent it from fully drying out. This is a cuticle oil from Honsik Polish, but any kind of jojoba oil or almond oil will work just fine. And then I just rub that into the skin until it is mostly absorbed.
Step 2:
Remove Old Polish
Now I'm gonna remove my nail polish. I use these cotton pads that have a protective layer on the back so I don't mess up my other nails. And I soak that nail with acetone to fully soften up that polish so it can just easily wipe away. You want your nails to be as clean as possible, so don't forget to get into those cuticles. Now, this is where I'm gonna say do as I say, not as I do, because I actually have a bend in my nail and this is damaged that I've been growing out for over a month when I did not oil my nails regularly. The best thing to do when that happens is to just keep your nails short until the damage grows out because it will eventually just break off. Next, I'm gonna clean up the nail. I personally do not cut my cuticles. I am not a trained nail tech, so I just push them back lightly or scrape them off with a wooden stick. This should not hurt at all and it should be done so gently since you do not want to damage your actual nail. Now, I personally don't have much cuticles because I've been doing my nails consistently for a few months, but you may have cuticles that look more like this. So just take your time scraping it away or use a cuticle remover oil to soften them up if they're particularly stubborn. And then I just push them back. If there is any dead skin left on the nail, you're basically asking for the nail polish to chip and to lift from that point. So when my nail plate looks pretty clean, I take a Q-tip or a cotton round and I just wipe it with acetone again. You want the nail to be dry because any oils will also cause the polish to chip or peel. Now we can finally move on to the base coat.
Step 4:
Base Coat
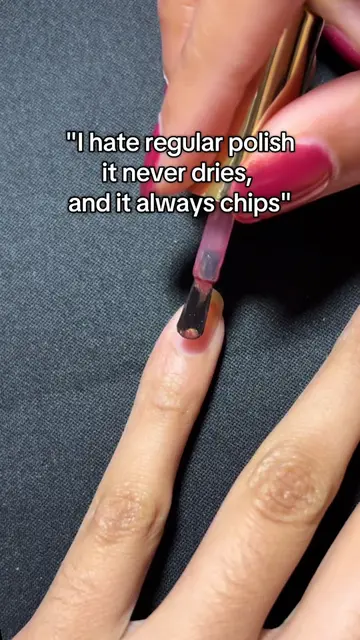
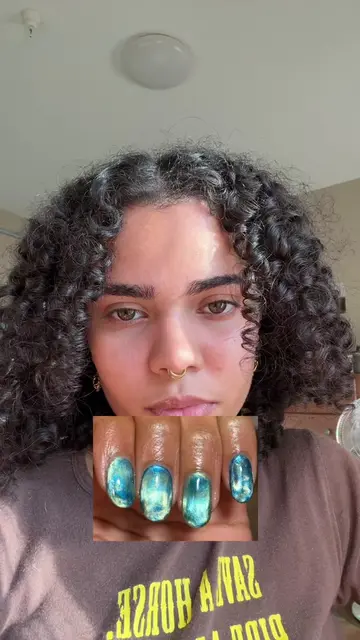
This is the OPI Natural Nail Base Coat. It's the first one I tried and it works really well for me. As you can see, my bottle is pretty much empty. The only issue with it is that it comes with a tiny, skinny brush, so it makes application a little bit difficult, but I'll use it up and try something else eventually. Now, the name of the game for here is not flooding your cuticles. When you take that brush out, you're gonna want to scrape it on the neck of the bottle so that you get all that excess polish off. And I'm left with a bead of nail polish on one side of the brush. In the application technique is pretty much the same as the base coat. I'm starting a little bit above the cuticle and then I inch it down a little bit, and then I pull it up. I do this on both sides of the nail and then I try to minimize the amount of swipes because by the time you've done that third swipe, it is already starting to dry. So move quickly with any of your finishing touches. And this is the easiest way for you to get more longevity out of your nail polish. You just cap that free edge!! I do this on every layer, and it's literally just a swipe across the tip of the nail. And it prevents chipping from the tip of your fingernail. Now I do two layers of base coat to prevent staining because I use very pigmented polishes, but you can skip this step. I also like this as a step to practice painting my nails again, like I'm getting myself warmed up for the real thing. Plus, if I missed a spot, this is my chance to fix it. Now onto the fun part, painting the nails! The nail polish I'm using is Bee's Knees Lacquer "The Water Remembers". This is a beautiful magnetic nail polish. And before I start painting my nails, I'm doing the same thing that I did with the base coat. I'm just swiping it on the neck of the bottle to get that excess polish off. And I'm left with a bead of nail polish on one side of the brush. In the application technique is pretty much the same as the base coat. I'm starting a little bit above the cuticle and then I inch it down a little bit, and then I pull it up. I do this on both sides of the nail and then I try to minimize the amount of swipes because by the time you've done that third swipe, it is already starting to dry. So move quickly with any of your finishing touches. And this is why I don't recommend instant dry nail polishes for beginners. Because they basically start drying the second that you take the brush out of the bottle, meaning you have way less time to work with it and get it clean. So if you're a beginner, it is actually easier for you to use nail polishes that have slightly more dry time, so you can work with it. This nail polish is still pretty fast drying. I only wait a couple minutes between coats. I magnetized this off camera and now she's ready for the top coat. Step 6:
Top Coat
Now, this isn't my cleanest application, but I'll show you how I handle that. "but solo I can just pick it off in the shower!" Yeah, sure. But think about it. If your nail polish is attached to your nail and your skin, then when you pick it off in the shower, it tears. It doesn't leave a clean edge. And in case any of that nail polish not in top coat, then it's going to chip. So I go in with my cleanup brush, which mine is literally just an eyebrow brush soaked with acetone, and I just clean off any of those edges down to the nail. I hope that makes sense because I also didn't think it was necessary until I tried it. But now I see the results and I'm preaching the gospel of the cleanup brush. Thank you for watching. May your manis be long lasting and chip free.