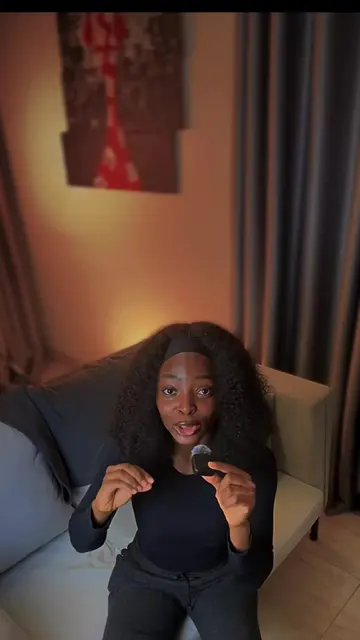
The video addresses common pain points for aspiring content creators by demystifying the process of achieving professional-looking videos with accessible tools. The creator's personal experience and the promise of a giveaway create strong engagement and a clear call to action.
Summary
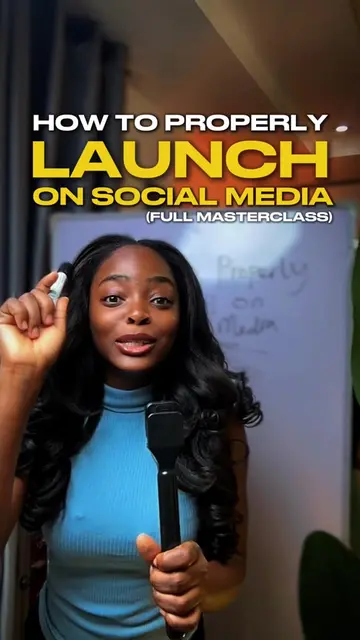
The creator shares a "Full Video Setup and Video Editing Masterclass" detailing how to achieve high-quality videos using just a phone. She highlights four key elements: using Snapchat's portrait mode for background blur, a specific lighting setup (Sutefoto P100 BI key light, Triopo dish, RGB light, and two LED lights), color grading on CapCut, and basic editing skills using CapCut, VMake, and Captions App. She also announces a 10-day video editing challenge where participants can win her exact lighting setup, with the course available for pre-order at a discounted price.
Structure
1Introduction to common questions about video quality.
2Revealing the use of a phone (iPhone 14 Pro Max) and Snapchat for recording.
3
Original caption
For the longest time, people have been asking meeeee 😂😂‼️… “How do you make your videos look like this?” “How is your background always clean and blurry?” “What camera do you use?” “What app do you edit with?” “How do you make your content look so premium?” And honestly… I used to ignore it. But not anymore. Let me be real with you: I shoot with my phone. I use Snapchat. I don’t use any crazy expensive camera. What makes the difference is lighting + editing + knowing what you’re doing. And that’s exactly what I’m about to teach you. I’m putting together a step-by-step Video Editing Course where I’ll show you: ✔️ How to shoot clean videos with your phone ✔️ How to set up your lights (even on a budget) ✔️ How to edit on CapCut like a pro ✔️ How to use fonts, colors & effects properly ✔️ How to join clips smoothly ✔️ How to make your content look premium and intentional No guesswork. No confusion. No “figure it out yourself.” Plus… I’ll be hosting a 10-Day Mini Video Editing Challenge for everyone who joins. And the serious people? I’ll be gifting some of you my exact lighting setup. Ring lights. LED lights. Full setup. Yes. The same one I use. This course will be just ₦15,000 But it’s going to be loaded with value. If you’re tired of: ❌ dull videos ❌ poor lighting ❌ inconsistent content ❌ looking unprofessional online This is for you. If you want to be part of this… 👇🏽 Comment EDITING And I’ll send you the link to join our video editing community and get full details. Let’s upgrade your content this year. 🚀✨
More from @tumiifebogun
More breakout videos from this creator.
Explaining the four key elements: Snapchat's portrait mode, lighting setup, color grading on CapCut, and basic editing skills.
4Detailing the specific lighting equipment used.
5Showcasing the impact of color grading and editing apps.
6Announcing a 10-day video editing challenge with prizes (lighting equipment).
7Providing course details, pricing, and enrollment information.
Product placement
Snapchat: ACTS - it is used to record videos, and its portrait mode feature provides a blurry background effect. Removing it would change how the videos are made.
Sutefoto P100 BI: ACTS - it is a key light used in the video setup. Removing it would change the lighting. It costs approximately 220,000 Naira.
Triopo: ACTS - it is a dish/softbox used with the key light. Removing it would change the lighting. It costs 65,000 Naira.
CapCut: ACTS - it is used for basic video editing and color grading. Removing it would change the editing process.
VMake: ACTS - it is used for captions and automated editing. Removing it would change the captioning and editing process.
Captions App: ACTS - it is used for captions. Removing it would change the captioning process.
Call to action
Comment the word "editing" or click the link in my bio to join my video editing community.
On-screen text
FULL VIDEO SETUP
AND VIDEO EDITING TUTORIAL
MASTERCLASS
1
SNAPCHAT
2
LIGHTING
SETUP
1. KEY LIGHT
P100 BI (SUTEFOTO)
2. RGB LIGHT
THE SPOTS RGB
3&4 2 LED LIGHTS
3
COLOUR GRADING
ON CAPCUT
4
BASIC VIDEO
EDITING
WHAT ARE THE
FONTS I USE?
HOW DO I
COLOUR GRADE?
HOW DO I
JOIN CLIPS?
HOW DO I
MASH UP VIDEOS?
HOW DO I
ACHIEVE THE EFFECTS?
I'LL BE GIFTING
MY EXACT LIGHTING SET UP
P100 BI LIGHT + DISH (SOFTBOX)
N15,000
ON PREORDER
COMMENT THE WORD
EDITING
OR
CLICK THE LINK
LINK IN MY BIO
BASIC
COLOUR GRADING
TRANSITIONS AND
EFFECTS
SHOOTING ON YOUR PHONE
LIKE A PRO
Transcript
One of the most asked questions I get every single time of creating content is how I make my videos to look like this.
"Tumi, how do you make your videos to look like this? What camera do you use? What lights do you use?"
Let's talk about it. Let's talk about how I make my videos look like this and how I edit my videos.
What if I told you that my video setup is not actually as complicated as a lot of you think.
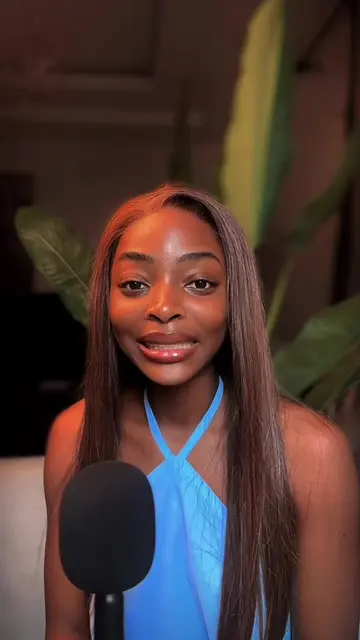
What if I also told you that I use the front camera of my phone to shoot my videos? I don't use the back camera 'cause I love to see my face.
Would you believe me?
And do you know the one thing that is going to shock you the most?
What if I told you that I use Snapchat to record all my videos?
All my videos. Would you believe me?
Yes, on your phone.
That's what I use to record this video and all of my videos on my page.
That is what gives me this blurry background effect.
That is what makes my videos looking like this.
Would you believe me?
And yes, I don't use a digital camera. A lot of people think I use a digital camera to shoot my videos. No, I use my iPhone 14 Pro Max to shoot my videos.
Would you believe me?
Yes, that's what I use to shoot my videos.
Would you believe me?
Would you believe me?
Yes, that's what I use to record this video and all of my videos on my page.
That is what gives me this blurry background effect.
That is what makes my videos looking like this.
Would you believe me?
And yes, I don't use a digital camera. A lot of people think I use a digital camera to shoot my videos. No, I use my iPhone 14 Pro Max to shoot my videos.
Would you believe me?
Would you believe me?
Now, let's take it step by step.
There are four major things that makes my videos look this quality, that makes my videos look like this.
1. SNAPCHAT
The first one is Snapchat.
I give it to Snapchat, yes.
As long as you're using an iPhone, there is just a way the Snapchat blurry effects makes your videos look like than the iPhone cinematic effects.
I don't like using that iPhone cinematic effects.
I prefer using the Snapchat's blurry background effect.
It is called the portrait mode.
All you just need to do is open your Snapchat app.
When you swipe down, you see a list of effects that Snapchat gives you when you want to record your videos.
You see portraits, you see studio mode, and you see reactions.
You see that portrait, click on that portrait, and you are going to get the same background effect you are seeing in my videos in your videos too.
2. LIGHTING SETUP
The second thing that makes my videos look this quality, that makes my videos look good is my lighting setup.
So I use four major lights.
The first light I use is my key light.
The name of this light is the P100 BI.
Sutefoto.
That is the name of my key light.
I got this light for about 220-something thousand.
Then I got it with a dish.
Name of this dish is Triopo.
I remember getting this dish for 65,000 Naira.
So that is my main light.
My second light is my RGB light.
The Spots RGB is what gives me the colored background effect.
Then I use two LED lights.
So I put the two at the back of my videos.
So combining all of these gives me this effect in my videos.
3. COLOUR GRADING ON CAPCUT
The third thing I do my videos achieve this quality all the time is color grading on CapCut.
This is how my video looks unedited on CapCut, and this is how my video looks after color grading.
So color grading always plays a huge role in the quality and outcome of my videos.
4. BASIC VIDEO EDITING
The fourth thing that helps my videos achieve this outcome is basic CapCut editing skills.
Trust me, just basic CapCut editing skills.
I'm talking about cutting clips, adding video effects, text placements, using the right fonts, right colors that fit in your video look and feel.
And I achieve all these three major editing apps: CapCut, VMake, the Captions App.
I use CapCut for basic editing, I use VMake for captions, automated editing, then I use Captions App for my captions.
So the outcome of my videos always looking like this is all these efforts combined.
And trust me, it is not complicated at all.
I do not waste time editing.
And yes, yes, I know you guys still have more questions.
WHAT ARE THE
FONTS I USE?
HOW DO I
COLOUR GRADE?
HOW DO I
JOIN CLIPS?
HOW DO I
MASH UP VIDEOS?
HOW DO I
ACHIEVE THE EFFECTS?
What are the fonts I use?
How do I color grade?
How do I join my clips and match up my clips?
Since Snapchat and Snapchat recording limit is two minutes, how do I mash up my videos together?
My flash effects, my sound effects, transitions, and all of that editing.
I know a lot of us still have a lot of questions.
So this is why I have been thinking.
I want to put every single thing from my lighting placement, to how I place my phone, how I edit on CapCut, how I color grade my font placements, every single thing, step by step.
Sound effects, lightning effects, transitions, and all of that good stuff.
Just basic, simple editing skills I do in one step-by-step video editing course.
And it is going to be very beginner-friendly.
So it is going to take you from being a beginner to very, very confident.
And not just that, this video editing course is going to come with a 10 days mini video editing challenge, and this is for people that really want their videos looking really good and take their video editing very seriously.
And for the people that are going to take this challenge very seriously and replicate every single thing I put together in that course, I'll be gifting my exact lighting setup.
I'll be gifting my exact lighting setup to some of you.
Yes, for anyone that wins in this challenge, just 10 days.
I'll be giving you this exact lighting setup that I use for my videos.
This light costs about 250,000 Naira now.
And I'll be gifting it to you.
Another person is going to take away this same RGB light I use for my videos.
Some of you will take away LED lights and some of you ringlights.
So one person is going to take away this same key light I use with the dish and the tripod and the main light.
I'm going to buy it for you.
Another person is going to take away this same RGB light I use for my videos.
Some of you will take away LED lights and some of you ringlights.
Now, this course is only going to cost 15,000 Naira only.
Just 15,000 Naira.
It is going to cost 15,000 Naira on pre-order price and 25,000 Naira after we launch the course.
I am making it very, very affordable so that even the beginner of the beginners join us in this course and will join us in this challenge.
And it is going to be very, very loaded.
You will learn basic editing skills on CapCut.
Basic editing on CapCut.
And putting clips together.
You will learn lightning setup, even on a budget.
You would also learn font placement and branding.
You will learn basic color grading.
Then I will show you some transitions and effects,
you shooting like a pro, even with your phone's camera.
Is this something you want?
If you want your videos look clean, and premium like mine,
just comment the word "editing", and I'll send you the link to join my video editing community, and you'll get the full details when enrollment opens.
Payments gets is going to open February 1st, and the course is going to be launched on the 9th of February.
So by the 9th of February, the course is going to be 25,000 Naira instead of the pre-launch price, 15,000 Naira.
So go ahead to comment the word "editing", and I will send you the link to join my video editing community or click the link in my bio to join.
I'll see you there.
I hope you found this helpful.
I'll see you.