Loading video…
All breakouts
90.6OtherBefore / After hookConsumer Apps
Hook
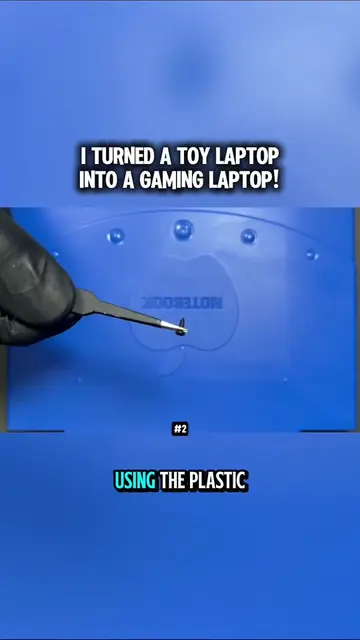
I TURNED A TOY LAPTOP INTO A GAMING LAPTOP!
@post.potion67
137.4K followers · usually 7.4K views a post
Views
663.7K
Likes
38.2K
Comments
351
Shares
1.3K
Why it worked
The video taps into the popular 'tech modding' trend, showcasing a creative transformation of an everyday object into something functional and unexpected. The clear step-by-step process and the surprising nature of the project likely contributed to its engagement.
Summary
The creator takes a toy laptop and an Android mini PC to combine them into a functional gaming device. They disassemble the toy laptop, remove its internal components, and then modify the toy's casing to fit the Android mini PC's motherboard and display. The process involves cutting plastic and securing the new components.
Structure
- 1Introduction: Turning a toy laptop into a gaming laptop.
- 2Disassembly of the toy laptop.
- 3Discovery of the Android mini PC.
- 4Preparation of the toy laptop's case for the new components.
- 5Mounting the new display and motherboard.
- 6Conclusion: The project is underway.
On-screen text
I TURNED A TOY LAPTOP INTO A GAMING LAPTOP!
MY NEPHEW'S LAPTOP
LAPTOP MIGHT BE
LITTLE TOO MUCH
CREDIT
WAIT IS THAT
AN APPLE LOGO
OH MY GOD
AN APPLE
JUST NOT APPLE
THIS THING HAS
EXACTLY ONE JOB
FLIP THE POWER
SWITCH PLAY A
FEW CHILDREN'S SONGS
SAME CUTE ANIMAL
ANIMATION OVER AND
OVER
UNTIL THE BATTERIES
DIE
EVEN THE KEYBOARD
MOUSE
BUTTONS AND TOUCHPAD
ARE COMPLETELY FAKE
THEY'RE ONLY THERE
REAL LAPTOP
SO TODAY
DO SOMETHING IT
WAS NEVER DESIGNED
I'M TURNING THIS
TOY LAPTOP INTO
A REAL GAMING
LET'S GET STARTED
FIRST LET'S TAKE
AT THE LAPTOP
I'M NOT ADMIRING
THE DESIGN OR
ANYTHING LIKE THAT
TO FIGURE OUT
WHETHER IT'S PHYSICALLY
POSSIBLE TO FIT
NEW HARDWARE INSIDE
THE FIRST THING
ATTENTION
WAS THE THICKNESS
AT AROUND 3.5
CM
IT'S SURPRISINGLY CHUNKY
BUT THAT'S NOT
REALLY THE PROBLEM
IS HOW TINY
I SEARCHED THROUGH
MY ENTIRE COLLECTION
OF SPARE PARTS
FIND A SINGLE
THAT WOULD ACTUALLY
FIT
INSIDE THIS CHASSIS
AND IT'S NOT
THE DISPLAY IS
INCREDIBLY SMALL TOO
ONLY ABOUT 13
CM WIDE
PROJECT MUCH HARDER
BECAUSE FINDING A
SCREEN THAT SMALL
ISN'T EASY AT
ALL
JUST WHEN I
OF IDEAS
COULD POSSIBLY FIT
INSIDE THIS TOY
LAPTOP
I STUMBLED ACROSS
SOMETHING PRETTY INTERESTING
A MINIATURE ANDROID
DESKTOP COMPUTER
ARE TYPICALLY USED
AS INFORMATION
KIOSKS OR DIGITAL
ADVERTISING DISPLAYS
ONE UP AS
FROM A CONVENIENCE
NOW LET'S SEE
WORKS
LOOK AT THAT
THE ANDROID LOGO
SO THIS LITTLE
COMPUTER IS STILL
UNFORTUNATELY IT'S
PRETTY
IT'S RUNNING ANDROID
6 WHICH DEFINITELY
SHOWS ITS AGE
SOME SURPRISINGLY CLEVER
IT HAS A
SMOOTH 7 INCH
ALONG WITH A
DECENT SELECTION OF
INCLUDING MINI HDMI
AND EVEN A
GIGABIT ETHERNET
FOR SOMETHING THAT
WAS NEVER MEANT
CONSUMER PC
AS FOR THE
PERFORMANCE WE'LL SAVE
THAT FOR LATER
WHAT MIGHT BE
THE HARDEST PART
PROJECT
I'M SOMEHOW GOING
TO FIT THIS
ENTIRE ANDROID MINI
INSIDE A TOY
SO THE FIRST
STEP IS TAKING
THE TOY LAPTOP
TOY LAPTOP WAS
ACTUALLY PRETTY EASY
ALL I HAD
REMOVE THE FOUR
ON THE BOTTOM
ONCE I OPENED
I COULDN'T HELP
BUT LAUGH
THE INSIDE WAS
AS IT GETS
TWO TINY CIRCUIT
BOARDS
SPEAKER WHICH MAKES
PERFECT SENSE
REMEMBER WHAT THIS
THING WAS ORIGINALLY
DESIGNED TO DO
JOB WAS OBVIOUS
EVERYTHING INSIDE HAD
TO GO
EVERY WIRE EVERY
EVERY UNNECESSARY PART
NEXT I REMOVED
THE DISPLAY ASSEMBLY
WAIT WHAT IS
THIS
REAL SCREEN THERE'S
PICTURE
A TINY 1
WATT MOTOR
ALMOST LIKE A
MINIATURE CONVEYOR BELT
LITTLE TOY BUT
THAT'S ABOUT IT
I'M NOT GOING
MUCH TIME TALKING
EVERY BIT OF
THIS SPACE IS
WITH SOMETHING FAR
MORE INTERESTING
THANKFULLY THERE AREN'T
MANY PARTS INSIDE
SO STRIPPING
TOY DOWN ONLY
TOOK A FEW MINUTES
NOW IT'S TIME
THE ANDROID MINI
PC
WE'RE WORKING WITH
THIS SMALL GREEN
IS THE HEART
OF THE ENTIRE
IT COMBINES THE
CPU
RAM AND STORAGE
ONTO A SINGLE
COMPACT MOTHERBOARD
FOR A PROJECT
ALMOST PERFECT
FOR A PROJECT LIKE THIS
THAT'S ALMOST PERFECT
TINY EFFICIENT AND
INCREDIBLY EASY TO
WORK WITH
SO I DISCONNECTED
AND LIFTED THE
MOTHERBOARD OUT OF
ITS ORIGINAL CASE
DISPLAY FORTUNATELY
IT WAS ONLY
HELD IN PLACE
WITH ADHESIVE STRIPS
WAS SURPRISINGLY EASY
NOW COMES THE
FIGURING OUT HOW
TO FIT EVERYTHING
INSIDE THE TOY
THE DISPLAY CABLE
IS EXTREMELY SHORT
THE MOTHERBOARD HAS
TO SIT DIRECTLY
BEHIND THE SCREEN
FOUR LITHIUM BATTERY
CELLS
THIS IS THE
LAYOUT I FINALLY
SETTLED ON
IS MOUNTING THE
NEW DISPLAY INTO
THE TOY LAPTOP
FIT
REMOVE A FEW
UNNECESSARY PLASTIC PIECES
AND TRIM AWAY
SEVERAL SUPPORT TABS
SO THE PANEL
CAN SIT PERFECTLY
TOP HALF OF
THE CASE
SINCE THE REPLACEMENT
DISPLAY IS SLIGHTLY
LARGER THAN THE
ORIGINAL OPENING
I ALSO HAVE
TO CUT AWAY
PLASTIC BEZEL
THAT'S BLOCKING THE
ONCE THAT'S DONE
THE DISPLAY DROPS
RIGHT INTO PLACE
IS BETTER THAN
I EXPECTED
TO SECURE IT
I'M USING HOT
FOUR CORNERS
IT'S SIMPLE
BUT IT'S MORE
FOR A PROJECT
LIKE THIS WITH
IN PLACE
FIGURE OUT WHERE
THE MOTHERBOARD WILL
UNFORTUNATELY
THE ORIGINAL PLASTIC
STANDOFFS GET IN
THE WAY SO
THEY HAVE
TO BE CUT
OUT AS WELL
WHILE I'M AT
I'LL CUT A
SMALL OPENING ALONG
SO I CAN
EXTERNAL PORTS
I'LL FAST FORWARD
THROUGH THIS PART
ABOUT 15 MINUTES
EVERYTHING IS FINALLY
TRIMMED TO SIZE
ORIGINALLY I PLANNED
MOTHERBOARD USING
5 MILLIMETER STANDOFFS
BUT THE MOUNTING
HOLES ARE MUCH SMALLER THAN I
EXPECTED
SO INSTEAD I'M
USING SMALLER SCREWS
Original caption
I TURNED A TOY LAPTOP INTO A GAMING LAPTOP!... #fyp #laptop #gaming #toy
More from @post.potion67
More breakout videos from this creator.